Environment host
OS version: ubuntu 20.04
QEMU version: 4.2.1
gdbserver version: 7.11.1
buildroot branch: 2016.08.xfirmware
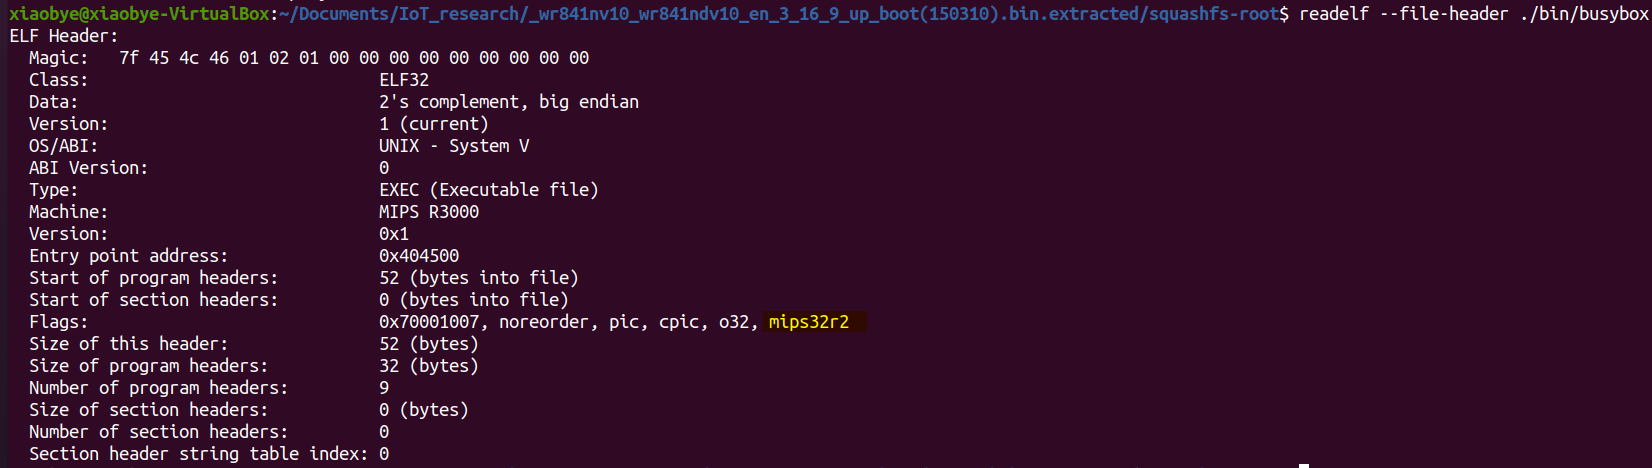
CPU: MIP32 big endian
Cross compile 測試用程式 撰寫了明顯有bof的測試程式。
1 2 3 4 5 6 7 8 #include <stdio.h> #include <string.h> int main (int argc,char *argv[]) char buf[10 ]; strcpy (buf,argv[1 ]); return 0 ; }
buildroot buildroot可以產出
cross-compilation toolchain
root filesystem
Linux kernel image
bootloader
我們利用cross-compilation toolchain來編譯我們的source code以及gdbserver。
使用舊版本的builtroot
1
2
3
git clone https://github.com/buildroot/buildroot.git cd buildrootgit checkout remotes/origin/2016.08.x
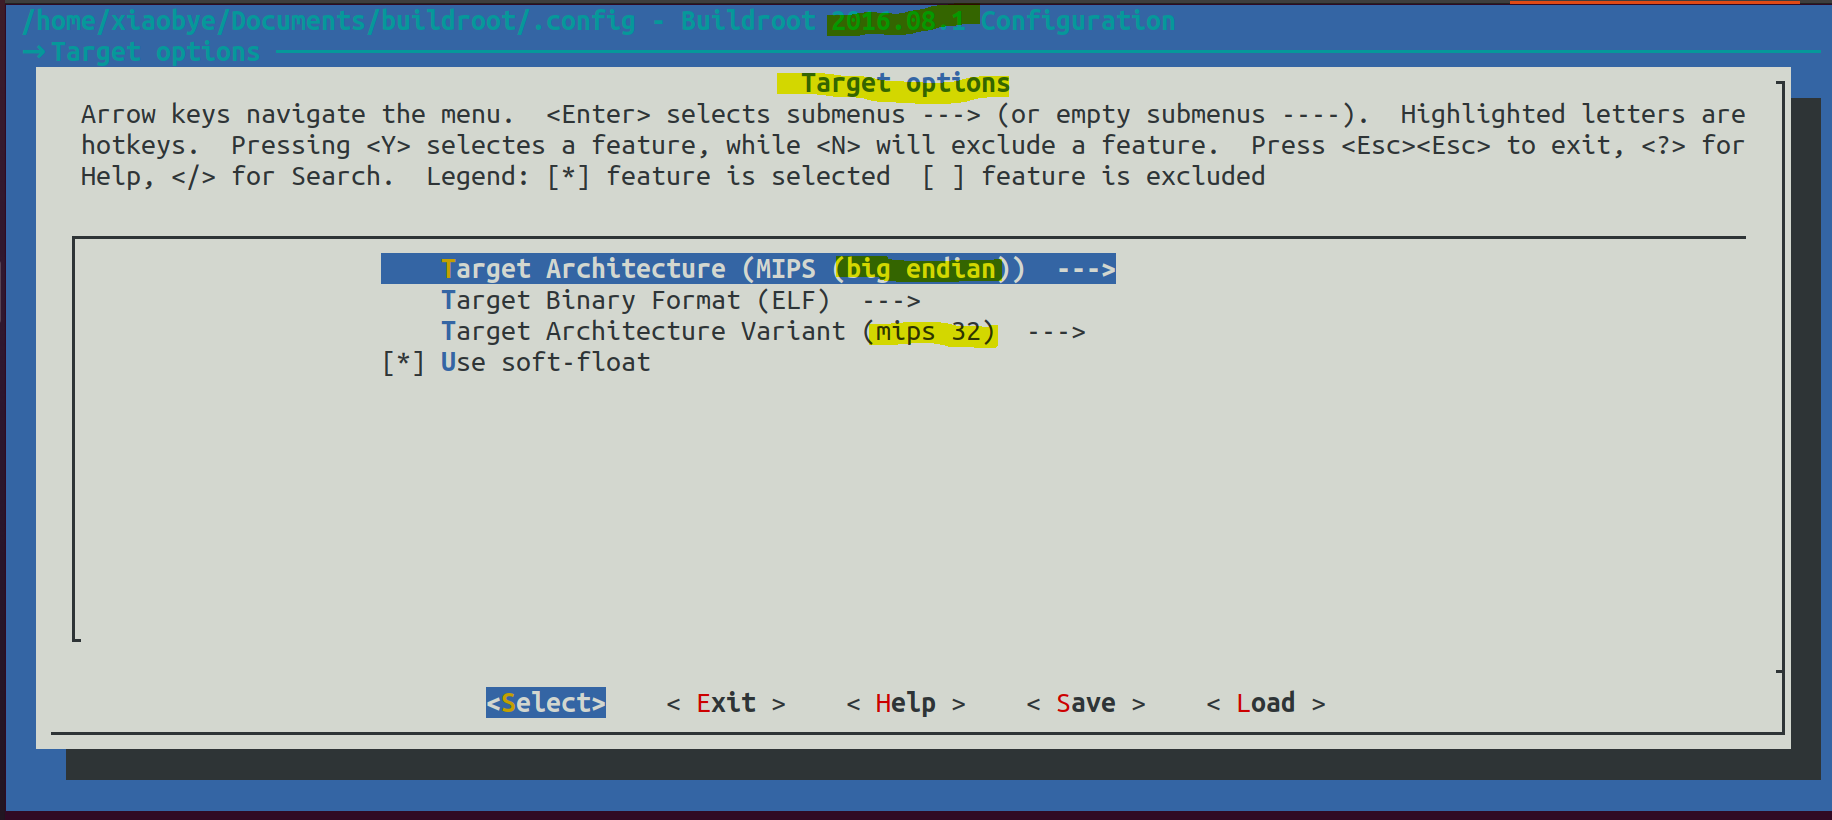
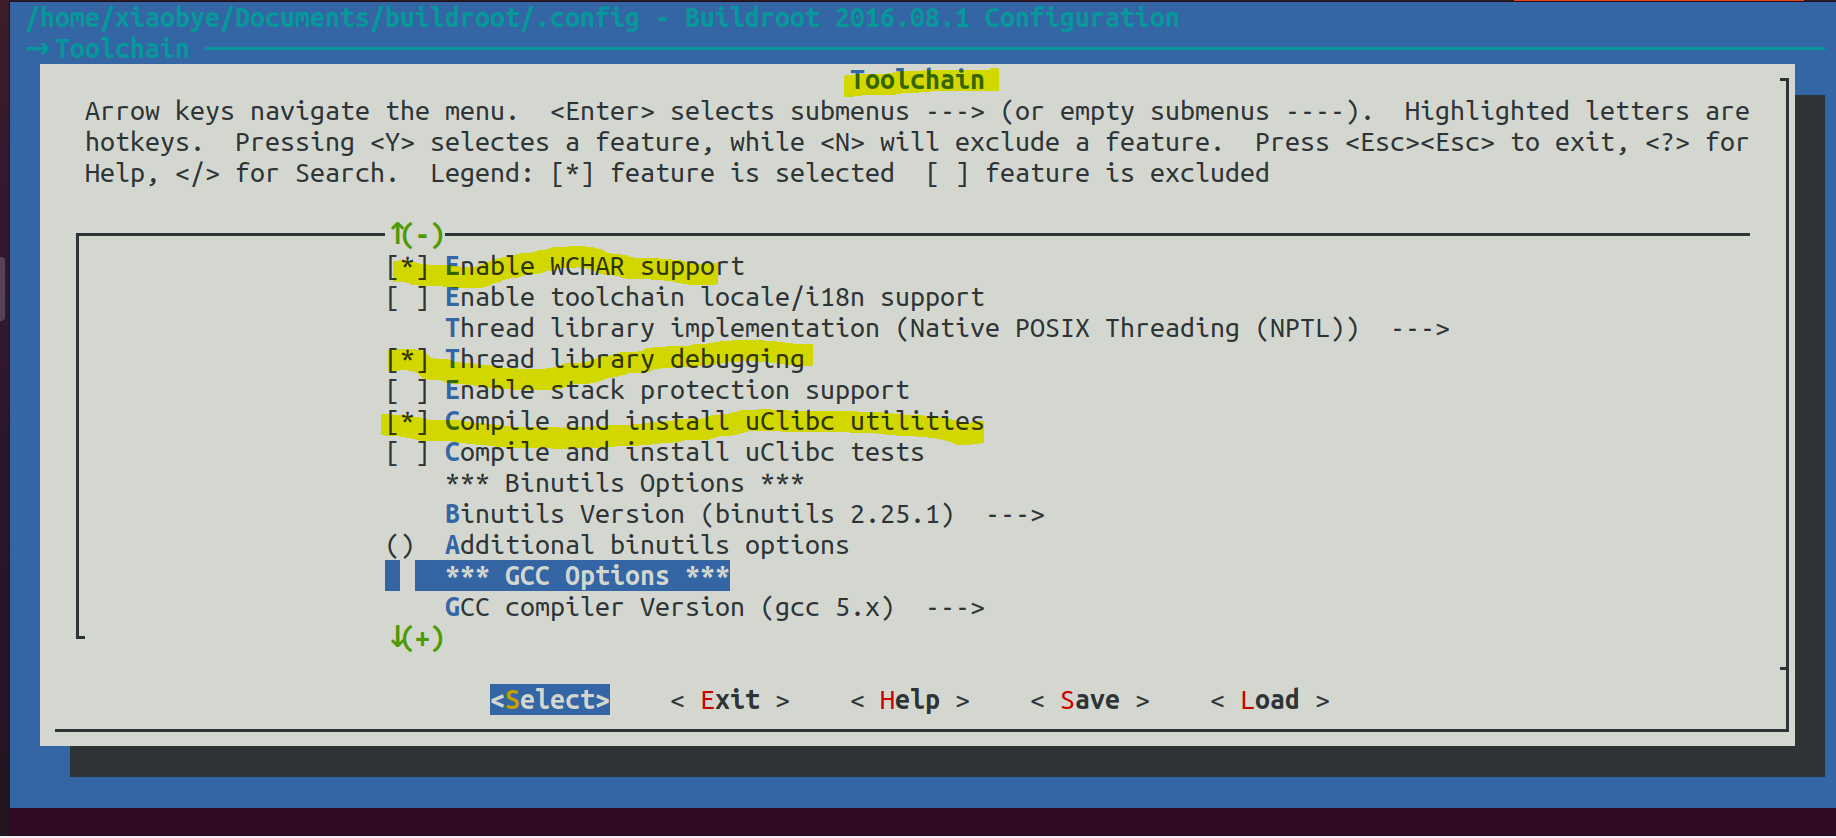
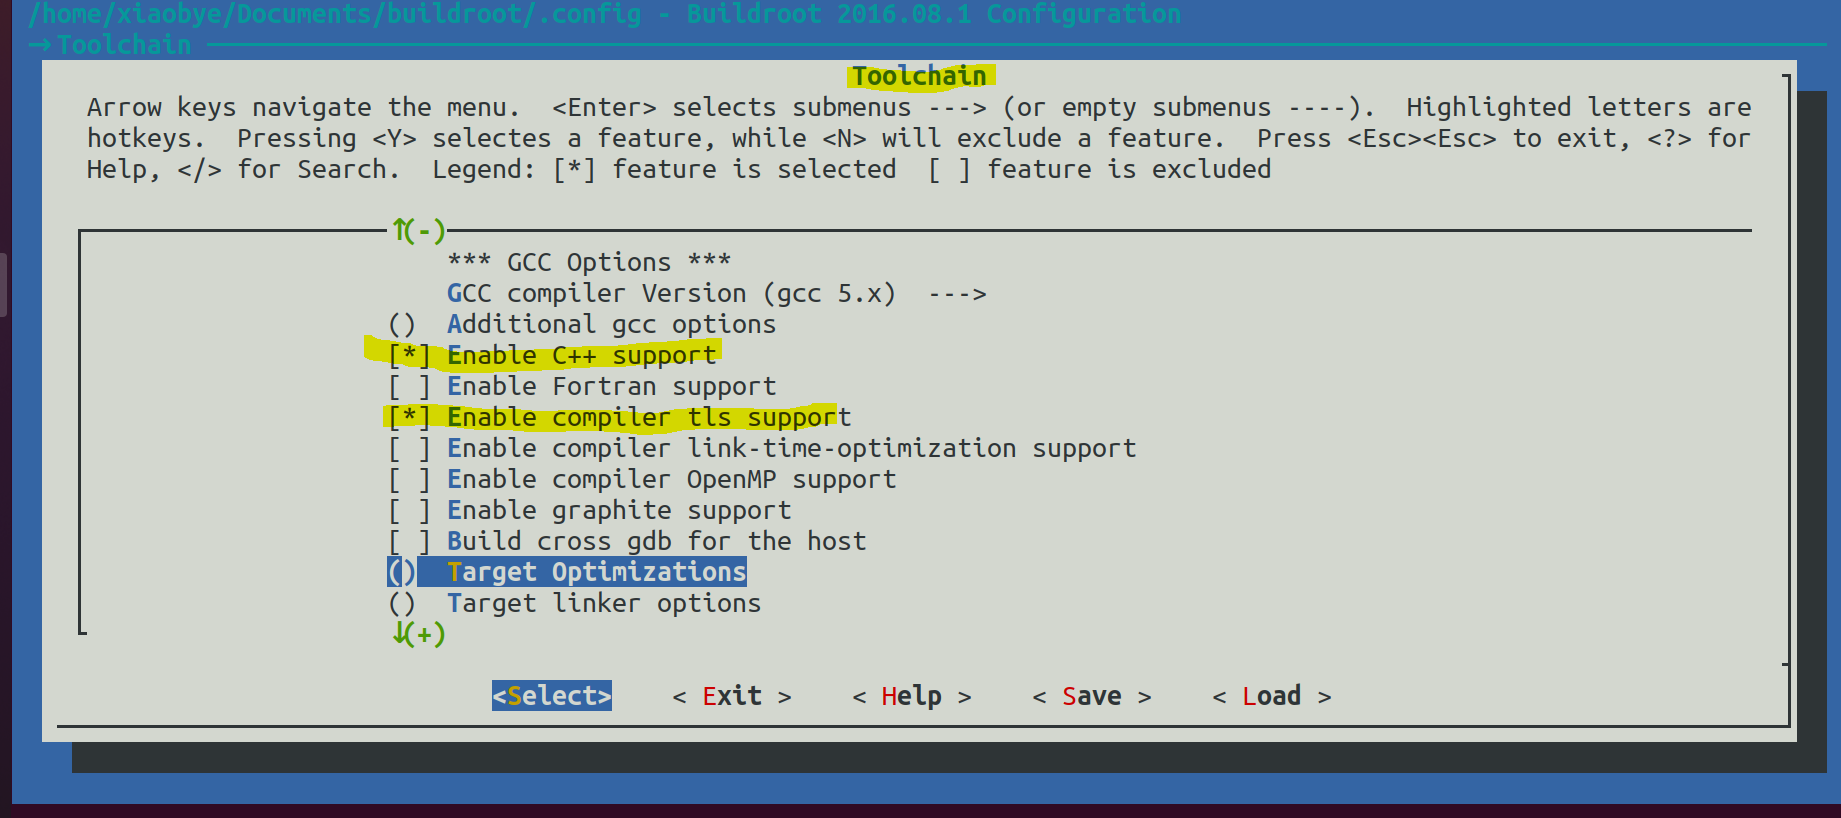
調整配置參數
target version配置如下圖的。
接下來開始編譯
1
2
3
4
5
6
7
make -j 16 cd output/build/host-m4-1.4.17/sed -i 's/IO_ftrylockfile/IO_EOF_SEEN/' lib/*.c echo "#define _IO_IN_BACKUP 0x100" >> lib/stdio-impl.h
gdbserver編譯 1 2 3 4 5 6 7 8 9 10 11 12 13 14 15 16 17 wget https://ftp.gnu.org/gnu/gdb/gdb-7.11.1.tar.gz tar xzvf gdb-7.11.1.tar.gz cd gdb-7.11.1/gdb/gdbserverexport PATH=$PATH ::/home/xiaobye/Documents/buildroot/output/host/usr/bin./configure --target=mips-linux \ --host=mips-linux \ --program-prefix=mips-linux \ --disable-build-with-cxx \ CFLAGS='-fPIC -static' sed -i -e 's/srv_linux_thread_db=yes//' configure.srv make -j 16
gdb-multiarch下載 1 sudo apt-get install -y gdb-multiarch
編譯測試用程式 1 2 3 export PATH=$PATH ::/home/xiaobye/Documents/buildroot/output/host/usr/binmips-linux-gcc -static -o vuln vuln.c
QEMU firmware emulation kernel&disk載點
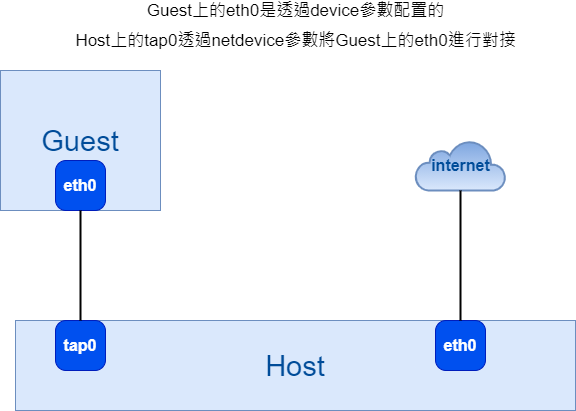
1 2 3 4 5 6 7 8 9 10 11 sudo tunctl -t tap0 sudo ifconfig tap0 192.168.50.2/24 up sudo qemu-system-mips -M malta \ -m 512M \ -kernel vmlinux-3.2.0-4-4kc-malta \ -hda debian_wheezy_mips_standard.qcow2 \ -append "root=/dev/sda1 console=tty0" \ -netdev tap,id=tapnet,ifname=tap0,script=no \ -device rtl8139,netdev=tapnet \ -nographic
虛擬機內,將/etc/network/interfaces的內容,替換成下方配置。
1 2 3 4 5 6 7 8 9 10 11 12 13 14 auto lo iface lo inet loopback allow-hotplug eth0 iface eth0 inet static address 192.168.50.1 netmask 255.255.255.0 gateway 192.168.50.2
設置虛擬機網卡IP
1 ifconfig eth0 192.168.50.1/24 up
上傳檔案 以下指令在host端執行
1 2 3 4 5 6 scp -r squashfs-root root@192.168.50.1:~ scp ./vuln root@192.168.50.1:~ scp ./gdbserver root@192.168.50.1:~
GDB Guest 在虛擬機中執行以下指令
1 ./gdbserver 0.0.0.0:9000 ./vuln AAAAAAAAAAAAAAAAAAAAAAAAAA
Host 在Host上執行以下指令啟動gdb-multiarch
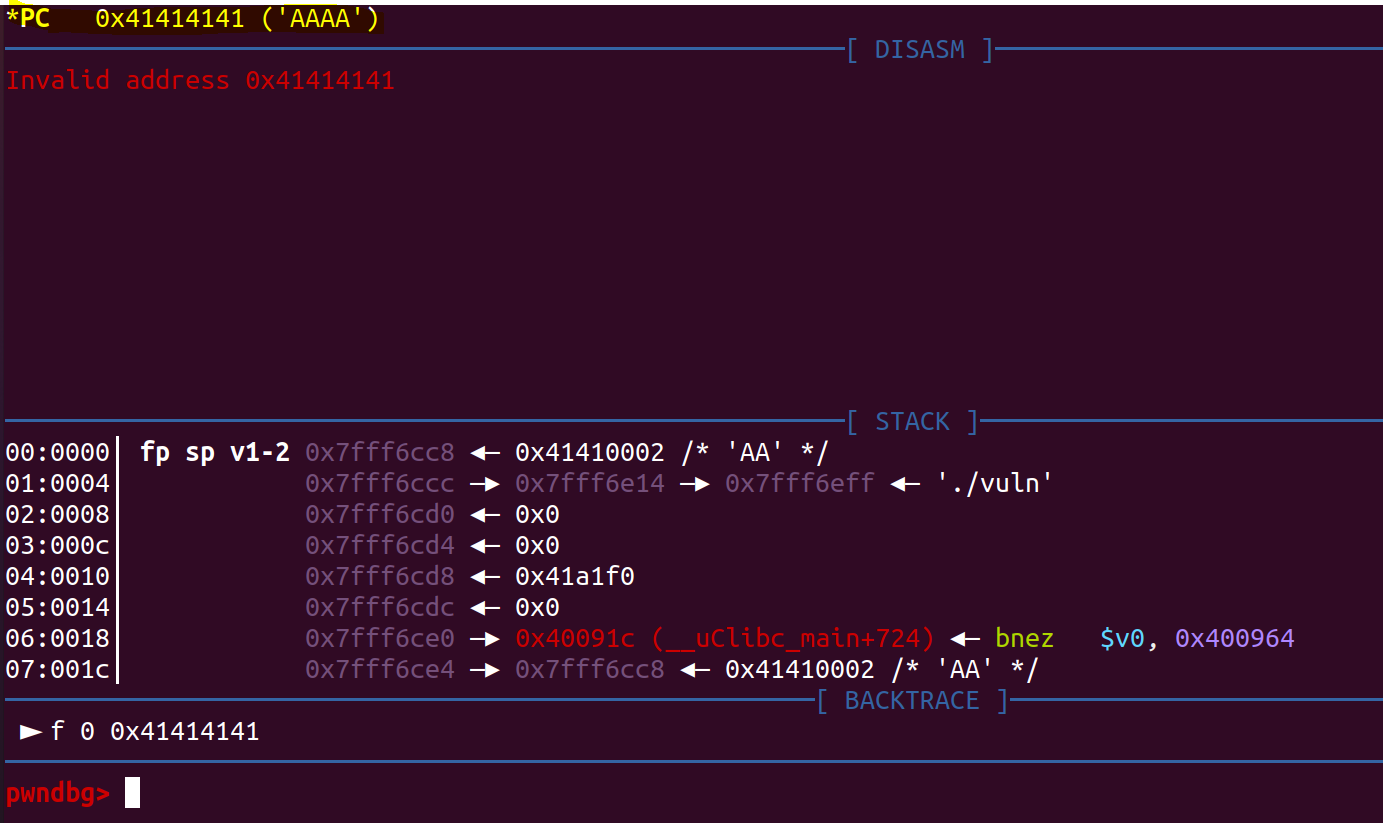
gdb中下指令連接到gdbserver,執行以下指令後可以發現確實造成Buffer overflow,覆蓋到PC。
1 2 target remote 192.168.50.1:9000 c
Resource 学习记录:交叉编译环境配置(buildroot and gdb&gdbserver) akpotter/embedded-toolkit CVE-2020-8423 栈溢出复现